Littlest has been eating table food for about a month now and she loves it! She does get quite messy though. Just the other day we had peas. Instead of eating them she thought it would be fun to squish every single one. Don't get me wrong, it looked like a lot of fun, but it was messy and that mess usually ends up on me. Not wanting either of us to look like big green sticky monsters I thought it was time for her to start wearing a bib at dinner time.
If you are like me you have numerous bibs lying around your house. I don't believe I have ever bought a bib but have been given probably close to 30 of them over five years and three kids. These bibs are great and they do the job but I wanted something that fit my little girl a bit better and something light weight.
This is where I came up with todays tutorial. I think she likes it don't you, or maybe it's the banana.

This is pretty simple and takes just a few items.
First print off my pattern. I have included two different styles. One is a typical stitch, turn, topstitch and the other is a serged edge stitch.
Next gather up your materials.
* small amounts of material. You really don't need much. I used scraps that I had from previous projects. I used flannel for both sides of my bibs. You could use terry cloth, minky or even repurpose those numerous receiving blankets we all get as gifts.
*pins, if you are a pin-aholic.
*scissors
*my pattern
*your favorite type of closure. I used snaps because it is what I already have. You could use velcro, button, or metal snaps.

After cutting out your pattern pieces, take whichever one you like and line it up on the fold of your fabric. Now you will need to cut the neck piece down the middle to separate it. I forgot to mark this on the pattern, sorry.

For the top stitch directions, I will label it TS and it will be in blue. For the serged edge directions I will label it S and it will be in red. For pictures I have shown the top stitched version.
TS: iron your pieces and pin them right sides together.
S: iron your pieces and pin them wrong sides together.
TS: using a 1/4" seam allowance, sew around the entire piece leaving a 2" opening. Clip your corners.
S: using either a serger or a regular sewing machine with a serger foot, serge, or zigzag around the entire piece. Make sure that you are stitching through both pieces.

TS: turn your piece inside out and iron. The neck pieces can be a little tricky. I like to use a pushing stick or a chopstick to get the corners out nicely. Now iron your piece.
TS: Top stitch over the entire piece making sure that you sew the opening closed. I used an 1/8" seam allowance.

TS & S: attach the closing of your choosing.

Pretty simple right? Oh and did I mention that they are reversible? They are!!!
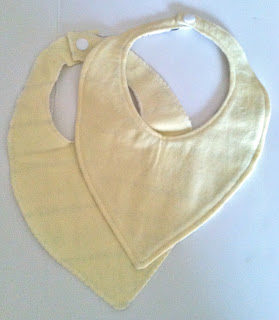
Now your little cuties will look adorable and protected in their new slim bibs.

I get an error message when I click the pattern link.
ReplyDeleteI'm so sorry about that. This is the link it is supposed to be attached to. You should be able to cut and past the following link and it will take you to the one page pattern. https://docs.google.com/viewer?a=v&pid=gmail&attid=0.0&thid=13d5f9a97605d127&mt=application/pdf&url=https://mail.google.com/mail/?ui%3D2%26ik%3D4f41e3a670%26view%3Datt%26th%3D13d5f9a97605d127%26attid%3D0.0%26disp%3Dsafe%26zw&sig=AHIEtbR6kcyIveyv_M1OCK6B_gaz4yPYCg
DeleteSorry, I get the same message when I copy and paste. It says it is unable to find document at it's original source and to make sure the document still exists.
DeleteThis comment has been removed by the author.
DeleteI'm receiving an error message as well. I realize that this post is a few years old but do you have it available still? I have a baby due in a couple months and would love to make this for him. Thanks!
ReplyDelete